
Movicon.NExT Help on Line - Tutorial
The project's graphical interface is managed using the Platform.NexT's main Movicon.NExT module.
The screens are fundamental resources used for creating graphical project screens.
To add a new Screen to the the project proceed as follows:
Go to the Project Explorer Window and select the "Screen" folder from the tree structure. Keep the mouse pointer on the resource to display the tooltip with the enabled "New Folder" and "New" commands. The "New Folder" command is used for adding folder within which to insert the screens. The folders are only needed for organizing screens into groups. The "New" command is used for inserting the new Screen.
A new Screen is inserted by using Project Explorer Window.
Once the "New" command has been pressed a window will appear enabling you to select a Create a Screen to use. As an alternative to inserting screens with the stand default settings Templates offer a selection of ready-to-use screens whose background colors and sizes can be customized as preferred. The list of Templates is made available when installing Movicon and contains a limited number of different screens that can to be added with new Screen Template created and saved by the programmer.
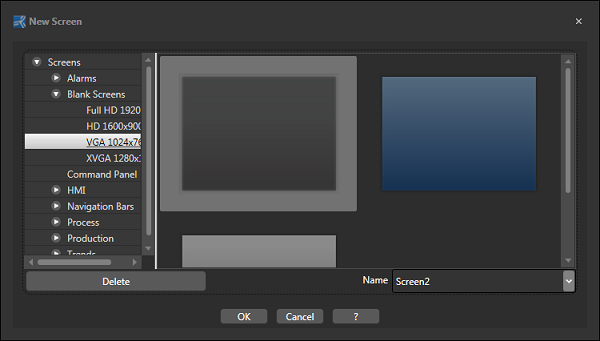
Window used for selecting a Screen Template to use for creating a new Screen.
Select a Screen Template from those available, enter a name for the screen in the appropriate field and confirm with "OK" to insert the new screen. Upon doing this the screen will also automatically open within the Movicon Workspace.

New Screen opened in the Movicon workspace.
Use the Properties Window to modify the screen's properties. Some properties can also be modified directly by using the commands in the Ribbons. For example, by clicking the "Edit Brush" command from the "Screen Manager - Style" Ribbon a colour selection window will open for the screen's background:
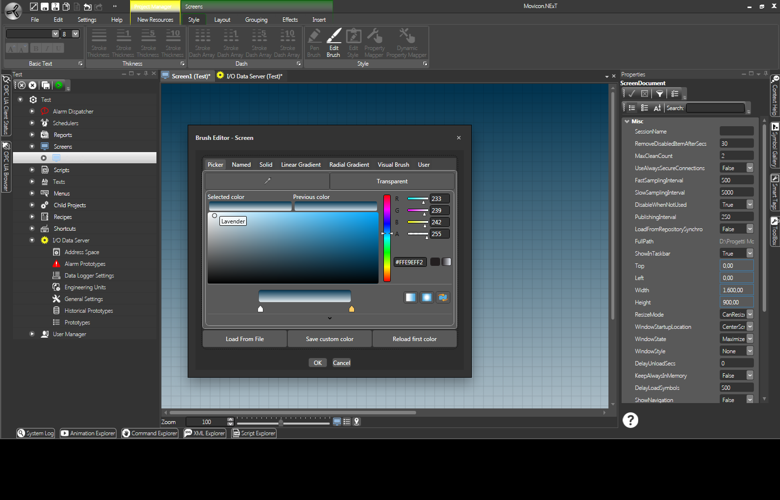
Window used for selecting a screen background colour.
Once a screen has been inserted in the project it can be deleted (Delete), have its name changed (Rename) and opened (Open) in the Workspace using the appropriate commands which display as tooltips when using the mouse to select the name of the screen from Project Explorer Window.
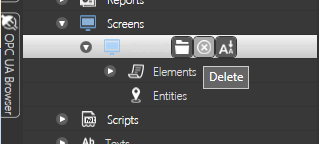
The Open, Delete and Rename screen commands can be activated within the Project Explorer Window.
The Screen Templates are screen models that are used for creating new project screens.
To create a Screen Template proceed as follows:
Open a Screen in the Movicon Workspace.
Configure as pleased, by giving it a different background color, size in pixels or company logo.
Assign a name indicating screen template type to be created.
Activate the "Create a Screen Template" command from the "Screen Manager - Grouping - Symbol" ribbon or textual menu which appears when right clicking on screen.

To create a Screen Template simple open the desired screen in the Workspace and activate the "Create a Screen Template" command.
When the create screen command accomplish its task successfully Movicon will show the "Screen Template has been created succesfully!" message. From this point onwards it will appear available for selecting along with the other screen templates on the list when inserting a new screen.
Screen Templates are saved in this folder:
C:\ProgramData\Progea\Movicon.NExT\NewScreenTypes\
Use the files within this folder for deleting or renaming Screen Templates.
![]()