Introduction
Hello and welcome to the new quick start guide on how to best use Movicon.NExT™.
In this technote we will show you how to publish a Movicon.NExT project by deploying it on the HMI client.
Procedure
In order to deploy a project we can opt to use Movicon WebHMI to
help us to this or not.
Lets look at two scenarios.
First scenario
Lets begin with going through the procedure to deploy a project
without the aid of WebHMI.
Starting from the Movicon.NExT 4.2 version, you can now transfer the
project from the machine where the project was developed to the PC
where it will be run in runtime by using a few simple steps
after having installed Movicon.NExT of the same build used in the
development machine.
To transfer the project to the target machine, do as follows:
- Install the same version and build of Movicon.NExT that you have on the development machine to the target PC.
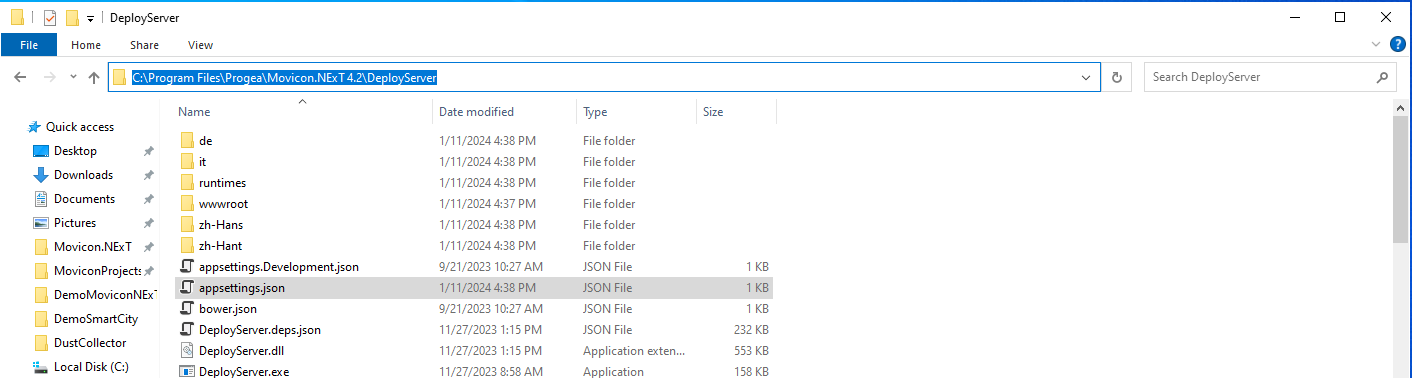
- Modify the appsettings.json file located in the C:\Program Files\Progea\Movicon.NExT 4.x\DeployServer folder of the target PC by entering the access credentials and destination folder for the DeployServer.

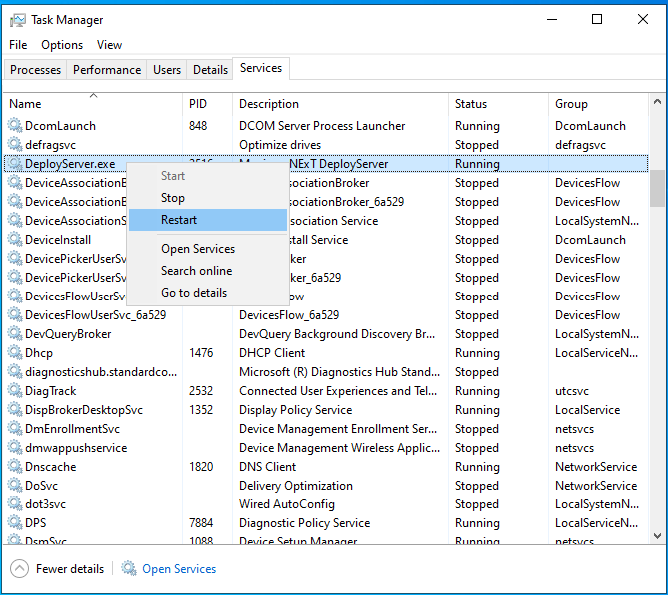
- Restart the DeployServer.exe service by using the Task Manager to reintialize the DeployServer and accept the changes made to the appsettings.json file. As an alternative, restart the PC.
- Open Movicon.NExT on the development PC.
- Go to the Option menu on the editor's toolbar at the far top and click on the Deploy and Start Project option to open the Deploy Project window.
- Enter the access credential that you defined in the target PC's appsettings.json file.
- Click on Connect.
- Confirm to use an insecure connection.
- Decline to transfer the I/O Data Server.
- Decline to transfer the WebHMI Server.
- Confirm to transfer the project.
Once this procedure has terminated, the project will have been copied in the destination folder on the runtime PC.
Second scenario
Lets now look at a second scenario. In this case, the project
type is the most important option to use. In order to create a WebHMI-based
project, the Project Type option should be set to WebHMI.
When selecting WebHMI as Project Type, the editor will change accordingly
to allow the user to use only those options and features which are
supported for that type of project. The user controls and objects
that are not supported will be highlighted in yellow and relocated.
To change the project type carry out the following procedure within
the Movicon.NExT development environment:
- Click on the project name within the Project Explorer pane.
- Open its Properties window.
- Go to the General property section and search for the the Project Type option.
- Select WebHMI.
- Click on the Accept Changes icon on the Properties window's top toolbar to confirm.
Once the project becomes WebHMI compatible, convert it to SVG by
clicking on the Create WebClient (SVG/HTML5) icon on the Editor's
main toolbar at the top or select Create WebClient (SVG/HTML5) item
from the Options menu.
When the conversion terminates, you will be asked whether the WebServer
and the project are to be transfered and run on a remote HMI. Click
Yes to confirm the selection and open the Deploy Project window.
This window allows you to deploy not only the project on the HMI device
but also the I/O Data Server and Web Server, which are all needed
to run Movicon WebHMI in standalone mode.
Fill in the first part of the window by entering the access credentials
to connect to the target machine's Deploy Server. The field you need
to fill in are:
- Profile name: unique identifier to distinguish it from the other various configured profiles.
- User: username to connect to the HMI PC's Deploy Server.
- Password: password to use in order to connect to the HMI PC's Deploy Server.
- Host: IP address or host name of the HMI PC. You must also specify the Deploy Server port.
- Reconnect Timeout: connection timeout parameter.
- Overwrite Retentive Files: when project is being deployed, it will overwrite the retentive data on the device with that of the development project.
Once you have completed filling in the first part, click on Connect. Once a connection has been established, click on Deploy Server and Project to deploy all of them. Once this process starts, a popup will show with a progress bar.
Once everything has been deployed, you will be able to access the project by using any HTML5-enabled Web Browser using these addresses:
http://:5000 when using the http protocol
https://:5001 when using the https protocol