Introduction
Hello and welcome to a new tutorial on Movicon.NExT™.
Today, we are going to see how to install Movicon.NExT™ in the Windows environment.
This procedure is key for the correct use of the software.
Procedure
Once you have downloaded the Movicon.NExT setup from the official Emerson Website, unblock it to prevent installation problems. This is done straight after downloading the software as follows:
- Right click the zip File
- Click on Properties
- Select the Unblock option
- Click on Apply button
- Click the OK button
After this operation, you can extract all the files from the zip
package.
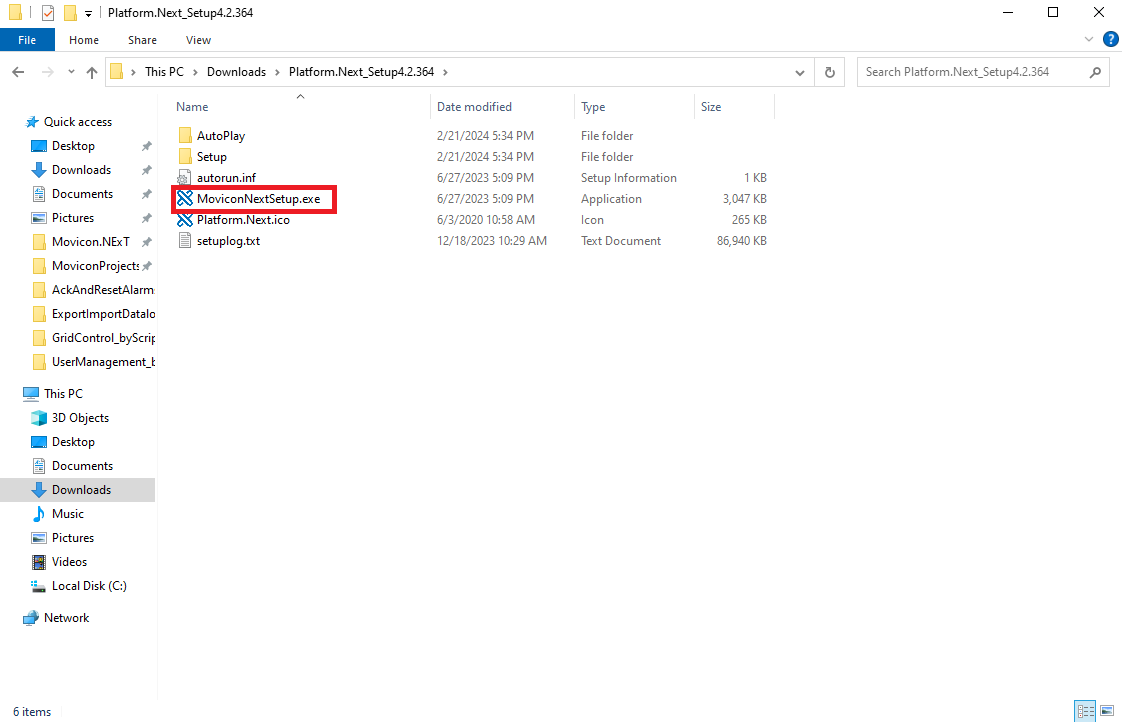
Once the extraction operation has completed, left-click twice on the
MoviconNextSetup.exe executable file to start the installation.
At this point, a dialog will appear enabling you to select the desired
software language or exit from the installation. The available languages
are: English (EN), Italian (IT), German (DE) and Chinese (CN).

Once you have selected the language, for example English, you must
then select which of the four options you wish to install:
- Movicon.NExT Setup: This is the classical setup. By selecting this option, the setup will install the Movicon.NExT software and a SQL Server Express instance.
- Movicon.NExT Compact: By selecting this option, the setup will install Movicon.NExT without the SQL Server Express and SQLite will be used instead.
- Deploy Server: This option is used to install all the components relating to Movicon WebHMI.
- NET License Service: By selecting this option, the setup will install the service by centralizing the license management.
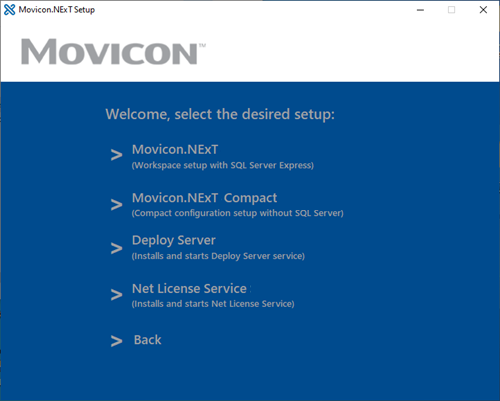
Let’s see the procedure used for the first option, therefore, by selecting the Movicon.NExT Setup.
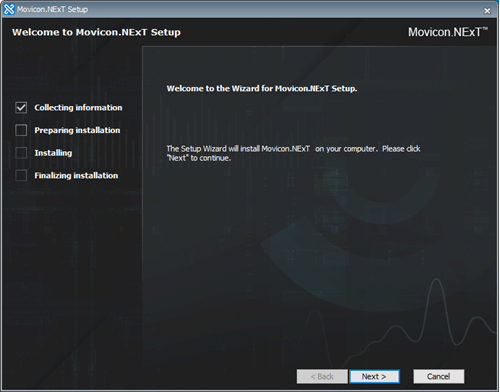
After having selected the Movicon.NExT Setup, it will automatically run a series of checks to see whether there is enough free disk space and that the necessary preparations have been made to ensure that the software is installed correctly.
Once these checks have been completed, click Next to continue.
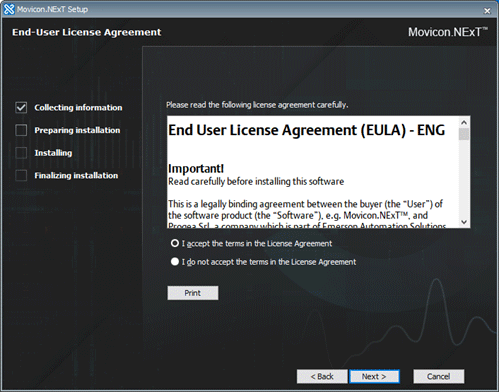
At this point, a License Agreement popup will appear prompting you to accept by selecting the “I accept the terms in the License Agreements” option, then click Next. Click on “I accept the terms” to confirm the license agreement terms and then click on the Next button again.
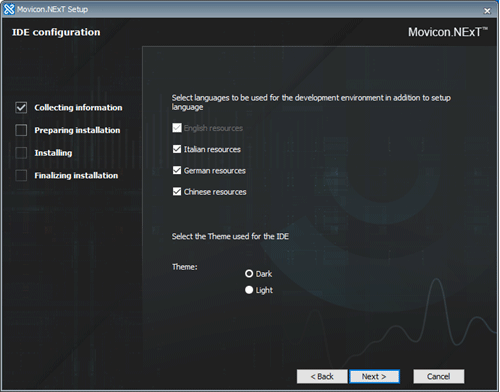
You can then choose whether to add additional language packages, which in our case are Italian, German and Chinese. You can also choose which theme to use for the Movicon.NExT editor: dark or light.
Click Next to continue the installation procedure.
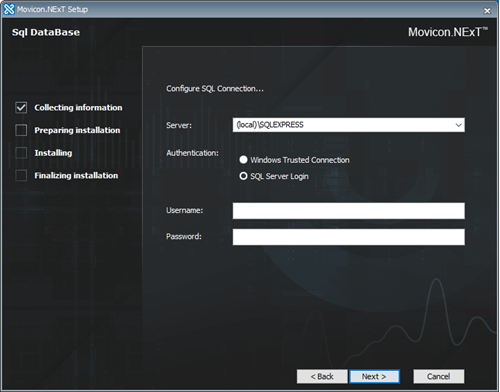
At this point, the setup will ask you to configure the SQL Server connection parameters. Let’s have a look at them in more detail:
- Server: This is the name of the SQL Server’s instance. You can select one from those already present on the pc. If there are no instances present, the setup will automatically install the SQL Server Express beforehand.
- Authentication: there are two types of authentication methods to choose from. The first one is the Windows Trusted Connection: access to the SQL Server instance is done by using the Windows user. The second one is the SQL Server Login: here, access to the SQL Server instance is done by using a SQL user configured by specifying their credentials. Before choosing this option, you will need to configure the SQL Server to accept mixed mode authentication. This authentication is handy when needing to use the SQL Server instance from a remote PC.
- Username: name of the configured SQL Server user granted access to the SQL Server instance.
- Password: this is the password of the configured SQL Server user who has been granted access to the SQL Server instance.
Now, the setup will prompt you to choose the type of installation you wish to use. The options are:
- Typical
- Custom
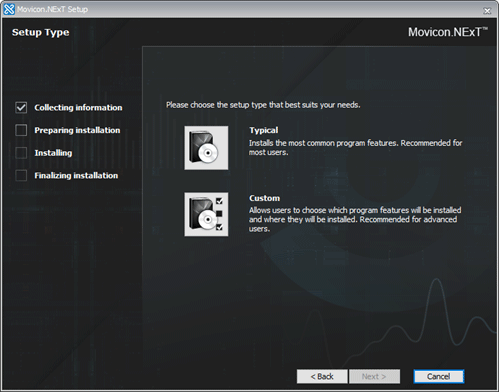
When choosing Custom, you will be authorized to change the installation path and to configure additional settings. Let’s have a closer look.
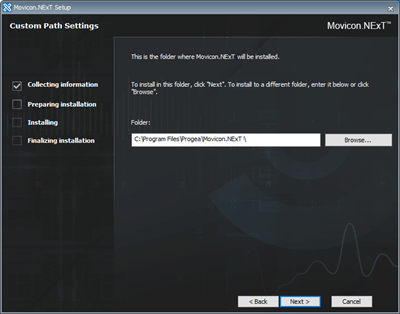
Once you have chosen the Custom installation and clicked the Next button, you will be given the possibility to change the installation path by selecting another folder when clicking the Browse button. Once this has been done, click on the Next button to continue.
At this point, the setup will allow you to configure the parameters relating to CFR21 part 11. These are:
- CFR 21 User Name
- User Type
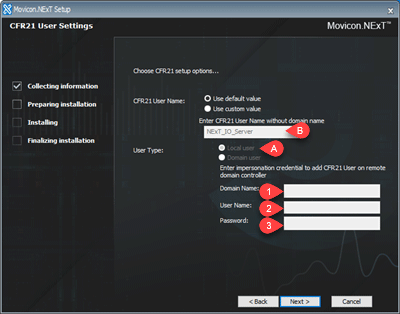
You can then choose between the Default Value (recommended option. The software uses the NExT_IO_Server name as local user) and the Custom Value. If you choose the Custom Value over the previous option, you will be authorized to define a username and its user type (Local or Domain user). If you choose the Domain User, you must specify the domain, username, and password of the CFR21 user.
Click on Next to continue.
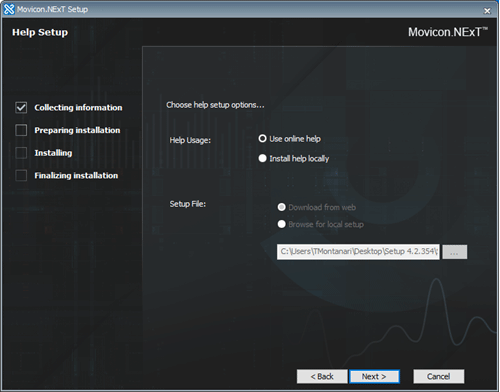
The Help manual is the last thing to configure. You can either:
- Use Help Online: no files will be installed locally, and the help online is updated with the latest release. You will need to have an internet connection in order to use the Help Online.
- Install Help locally: the setup will install the help files locally on your pc. We recommend you use this if you do not have access to an internet connection.
- Download from web/Browse for local setup: you can choose whether to download Help from the Emerson website or select the local setup to install the help files locally.
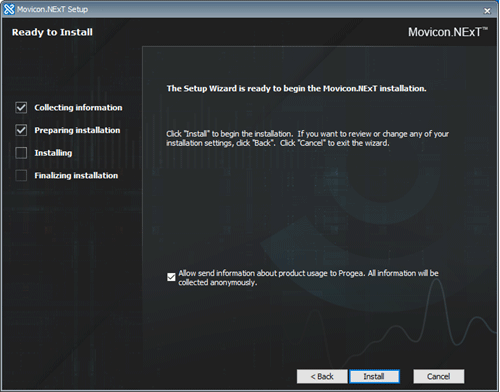
You have now reached the last step of the installation wizard where you simply need to press the Install button to install Movicon.NExT.
Once the installation procedure has terminated, click the Finish button to complete the Movicon.NExT installation.
Congratulations! You have installed your Movicon.NExT instance correctly.