Movicon.NExT Help on Line - Rel. 4.2.358
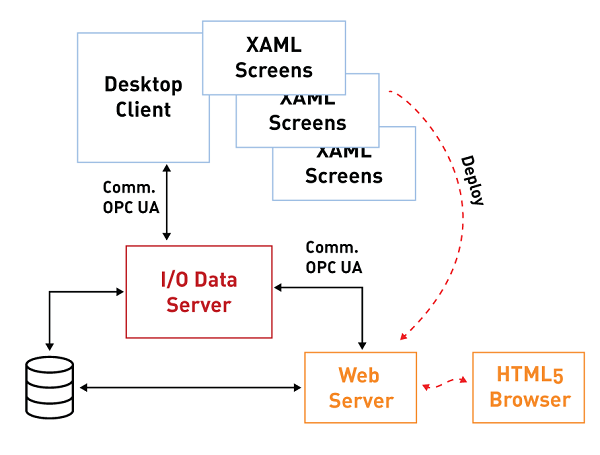
As seen in the introduction, the WebHMI uses an integrated Web Server to expose projects for access by Client Browsers.
In order to deploy the Movicon.NExT project using the integrated Web Server, its pages are exported from XAML vector graphic format to SVG format using the deploy tool as shown in the below paragraphics.

Propriety: Project Type
The "Project Type" property is one of the project properties that is used to set the project as a "WebHMI" type.
When setting the project as "WebHMI", the Project Explorer, Toolbox and Animation Explorer and Command windows will only show the resources, animation objects and command that are supported while visualizing and using Web Client WebHMI.
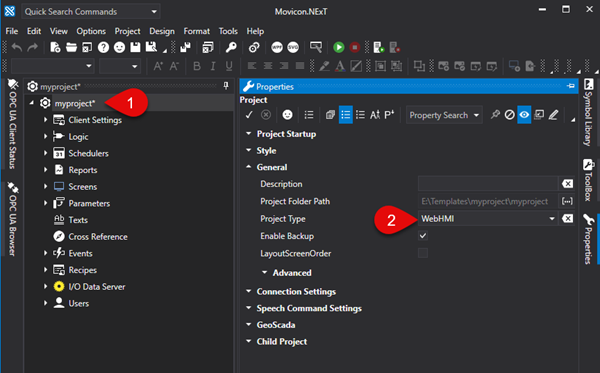
This property setting is particularly useful when:
planning to develop a project that includes only those functions supported by WebHMI,
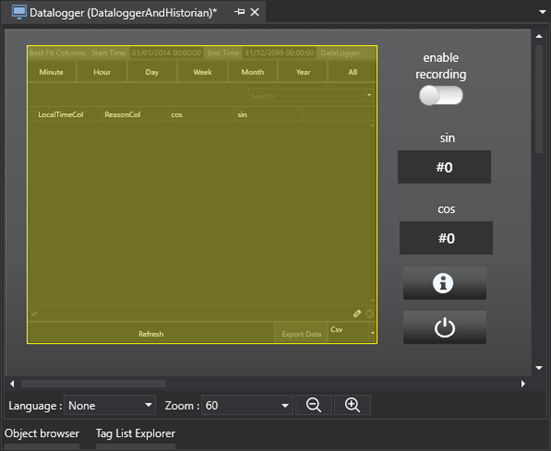
needing to verify the compatibility of a previously developed project with WebHMI visualization. Any objects and symbols used in the project and not supported by WebHMI will be highlighted as shown in the screenshot below.
Deploying Projects Locally
To deploy a project in the integrated Web Server to then make it accessible to Client Browsers, simply select Options menu > Create WebClient (SVG/HTML5) or select Create WebClient (SVG/HTML5) from the project's Toolbar to start the project's export to SVG.

Once this procedure has terminated, you will be prompted to confirm whether or not the Web Server and the Project is to be deployed and run on a remote HMI as shown below:
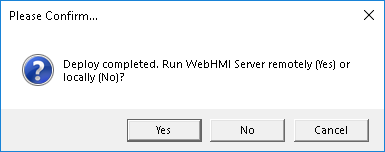
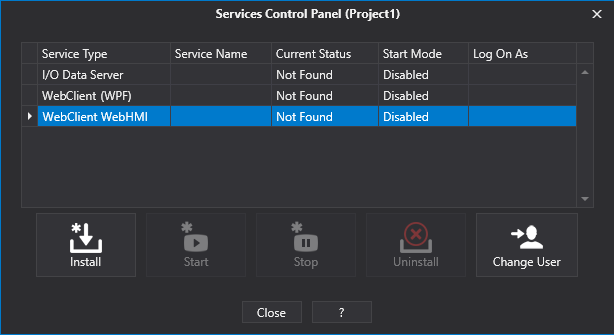
When selecting "No", a Service Control Panel will open through which the "WebClient (SVG/HTML5)" service can be installed and run locally:
Connecting with Browser
The project is deployed by the integrated Web Server on ports 5000 (http) and 5001 (https).
The default configuration requires that the request received on port 5000 be automatically redirected to port 5001. To change these settings please refer to chapter on "Integrated Web Server Settings" .
The following addresses can be used to access pages exposed by the Web Server:
http://<WebServer_IP_Address>:5000
https://<WebServer_IP_Address>:5001
Example: https://192.168.10.10:5001
It is also possible to open a different screen to use as the start page instead of the one defined as the Main Page in the project. To do this simply add the name of the screen to be opened to the url using the following syntax:
https://<WebServer_IP_Address>:5001/?page=<ScreenName>
where <ScreenName> is the name of the Screen without an extension. If the screen is inside a folder, the name of that folder should also be specified.
Example:
https://192.168.10.10:5001/?page=Screen1
https://192.168.10.10:5001/?page=Folder1/Screen1
Ultimately, a parameter file can also be passed while loading the specified screen. In order to do this, you must add the name of the parameter file to the url after the name of the screen:
https://<WebServer_IP_Address>:5001/?page=<ScreenName>¶meter=<ParameterName>
where <ParameterName> is the name of the Parameter file without an extension. If the parameter file is inside a folder, you should also specify the name of that folder.
Example:
https://192.168.10.10:5001/?page=Screen1&Parameter1
https://192.168.10.10:5001/?page=Folder1/Screen1&Folder1/Parameter1
In addition, the WebHMI page can be opened by performing user logon directly from the URL. To do this, simply add the username and password to the URL using the following syntax:
https://<WebServer_IP_Address>:5001/?user=<UserName>&psw=<UserPassword>
where <UserName> is the name of the user who will logon and the <UserPassword> is the user's password.
Example:
https://192.168.10.10:5001/?user=User1&psw=12345
User logon can also be performed using a specific screen as follows:
https://192.168.10.10:5001/?page=Screen1¶meter=Parmeter1&user=User1&psw=12345