Movicon.NExT Help on Line - Rel. 4.2.358
The graphic object used on screen (User Controls from the toolbox and Symbols from the System's Library) can be grouped together to form a customized symbol composed of a mixed number of elements. This mechanism can result very handy when, for example, the customized symbol must be used many times in the project. These symbols can also be added to the Project's Symbol Library for subsequent reuse.
How to create a customized symbol.
To create a customized symbol, simply select a group of graphical objects on screen and then:
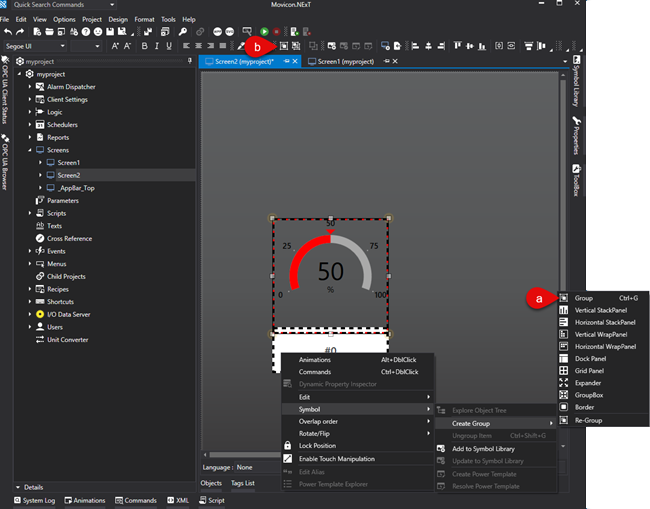
Call the contextual menu, which opens when right clicking on the selection of elements, and select Symbol > Create Group > Group.
Alternatively, select the "Group" icon from the Toolbar.
Use the CTRL + G shortcut.

Once the group has been created, you can insert it in the Project's Symbol Library:
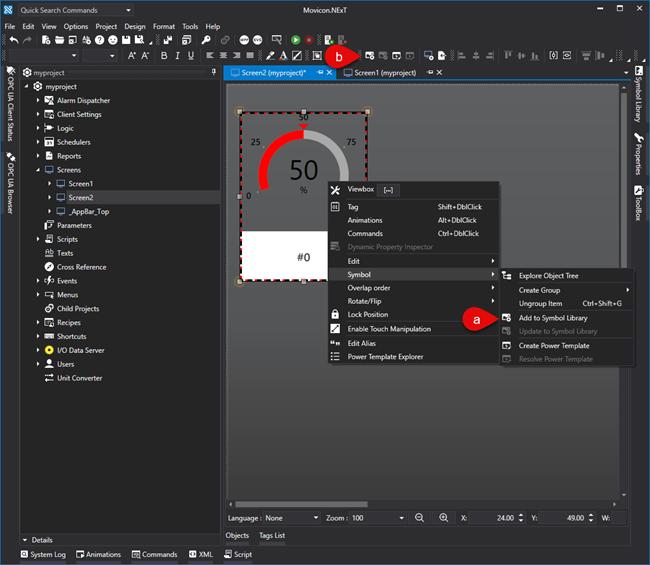
Call the contextual menu again and select Symbol > Add to Symbol Library
Or from the Toolbar selecting the "Add To Symbol Library" icon.
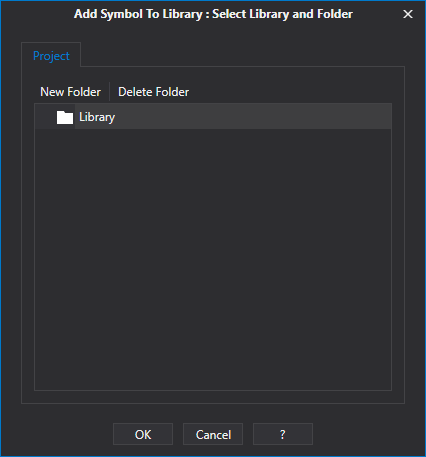
At this point it will be possible to select/create the folder in the Project Library in which to save the custom symbol.
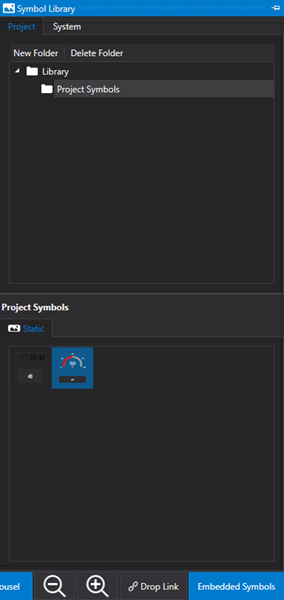
If you do not create/select a folder, a default "Project Symbols" folder will be created once you click the OK button to confirm.
Doing this will also update the symbol library with the new folder.
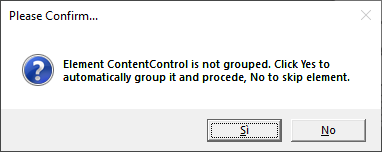
When creating a custom symbol composed of just one object (e.g. a Display or Button with customized characteristics), you will need to first create a Group to transform the object into a Viewbox. However, in this case, Movicon will prompt a confirm to transform the object into a Viewbox before adding it to the library. In this phase, if more than one object has been selected, each object will be converted and added to the library individually. This operation can be aborted by clicking 'No' in the messagebox:
Drop Link or Embedded Symbol?
When inserting a symbol from the project's library on screen, you will need to consider the following important concepts that will detemine how symbols are managed in the project.
Drop Link
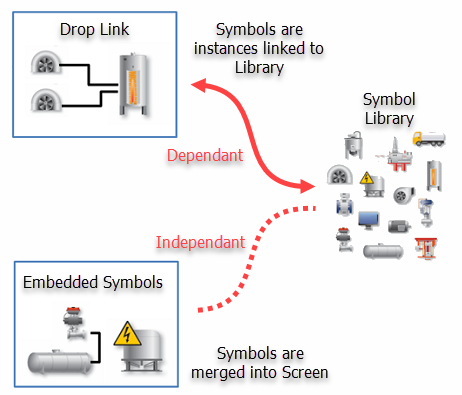
When dragging a symbol from the library on screen with the "Drop Link" option active, a symbol instance is created on screen which will remain "linked" to the symbol library.
This means that when the corresponding symbol in the library changes, all the symbols' instances in the project will update as a consequence.
|
The "Drop Link" option is activated by default |
Embedded Symbol
When dragging a symbol from the library on screen with the "Embedded Symbol" option active, a copy of the symbol is created on screen and therefore it will become local and independent from the Symbol Library.
|
The "Embedded Symbol" option is not available for the system's library. |
How to edit symbols from the project library.
When using the "Drop Link" option for symbols on screen gives you the advantage to edit the symbol in the library that in turn will be inherited by all they symbols in the project.
To edit/update customized symbols simply follow these steps:
1. Drag the customized symbol on screen with the "Embedded Symbol" option active.
2. Edit the symbol as needed.
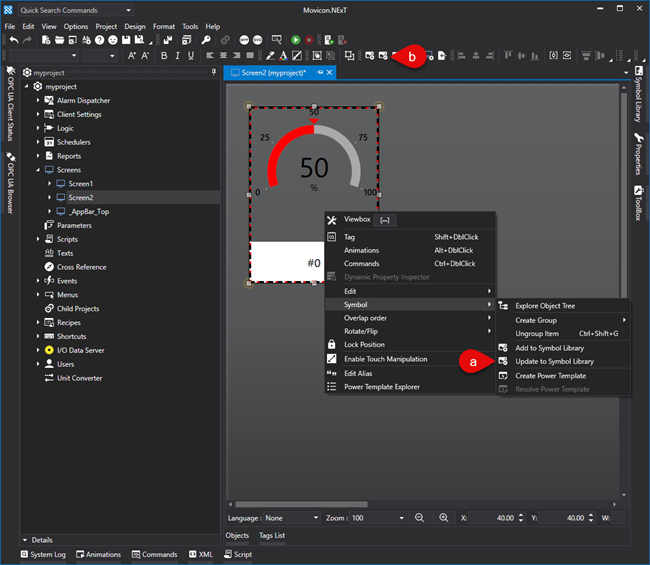
3. Call the contextual menu and select Symbol > Update to Symbol Library or (B) select "Update To Symbol Library" from the toolbar.
|
When you ungroup the symbol, using the Ungroup command, you will need to regroup it by using the "Re-Group" command. As an alternative, you can edit each single element composing the customized symbol as indicated in the chapter on "Selecting components of Composed Symbols" or by using the Object Explorer window. |
|
The properties that are inherited by symbols in the project following modifications of symbols in the library, are all those properties from the Preserve Template Changes group which are not active. For further information, please refer to the "Preserve" properties relating to the objects from the ToolBox. |
Dropping Symbol Code
Once a symbol has been inserted in the library, its associated script code can then be edited. When the symbol is insert on screen, the script code will then be executed. The scope of this script code is to allow some of the symbol's characteristics to be customized, such as assigning a Tag or modifying one of its properties. The “DroppingCode_Customizing” event is available in the script code and is automatically executed when the symbol is inserted on screen. The code needed to customize the symbol can be then inserted in this event.
To access the window used for inserting script code, select the symbol while in the library and use the “Code” command (the command can be found in the contextual menu, that appears when right clicking on the symbol, or in the button at the bottom of the library).
This function is very handy for setting the symbol's statical properties. You can do this by means of using the ScreenEntity's Props() function to set the symbol's string type statical properties. If these properties are set while inserting the symbol by means of using the Code contained in the Dropping Code, they will permanently remain in that symbol when they are saved together with the symbol's characteristics. In addition, these properties can also be accessed in read and write at runtime.
Substantially, the Dropping Code is useful for customizing Library Symbols when being inserted on screen.
Once the symbol has been inserted on screen, the Dropping Code can then be executed once again by using the "Execute Dropping Code” command from the contextual menu that appears when right clicking on the symbol. This will allow you to further modify the symbol's properties after the symbol has been inserted on screen.
Below is an example of how simple Dropping Code is used to add three “Props” to the symbol:
Public Sub DroppingCode_Customizing(ByVal sender As Object, ByVal e As System.EventArgs) Handles DroppingCode.Customizing
'*** Create Props ***
If Not Entity.Props.ContainsKey("Prop_Display_MeasUnit") Then
Entity.Props.Add("Prop_Display_MeasUnit", "mm")
End If
If Not Entity.Props.ContainsKey("Prop_Display_PrecisionDigit") Then
Entity.Props.Add("Prop_Display_PrecisionDigit", "1")
End If
If Not Entity.Props.ContainsKey("Prop_Button_Text") Then
Entity.Props.Add("Prop_Button_Text", "Increase")
End If
'**********
'Force Screen to be Saved
Entity.Document.NeedsSave = True
End Sub