Movicon.NExT Help on Line - Rel. 4.2.358
Movicon.NExT uses the Microsoft Bing® Maps services but also allows you to change the default map provider or save maps in your own system in order to load them from a local path. This is very handy in those cases where the only internet connection you have is not always available.
Using the Open Street Map
In the "DocumentManagers" folder within the Movicon.NExT installation path, you will find the "ScreenManager.dll.config" file through which it is possible to change the map provider from Microsoft Bing Map to Open Street Map. This is done by simply editing the file to change the "UseOpenStreetMapProvider" option from False to True as indicated in the image below:

Using maps locally
In order to use the maps locally to avoid needing to use an active internet connection simply:
Download the map of the interested area in ".osm.pbf" format.
Files which are continuously updated are available, for example at, http://download.geofabrik.de, which allows you to select the various areas in the world. Obviously, the larger the area, the more time it will take to download the data and, as a consequence, to process them (for example, a file containing the map of Italy is more than 1 GB and takes several hours to elaborate).
Generating the Tiles of downloaded maps
To generate the Tiles which compose the map, you will need to use Maperitive for example, which is a free program that you can get from http://maperitive.net/.
Once started up, Maperitive allows you to open the map in ".pbf" with the File menu >Open map sources item and generate the generate the map Tiles using the Tool menu > Generate Tiles.
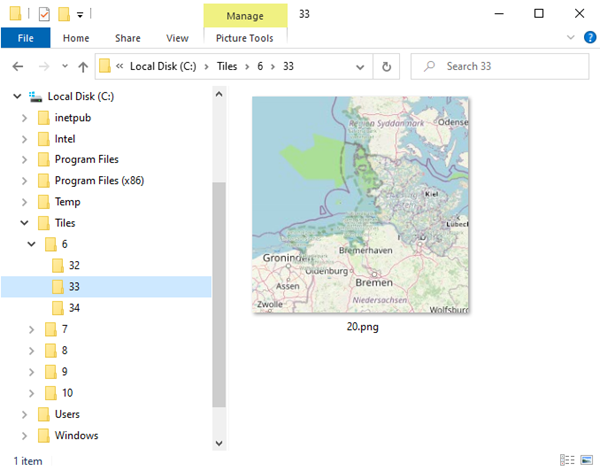
The Tiles are generated in the "Tiles" folder within the Maperitive application path with a 6 to 10 zoom level. If you need to generate Tile with a wider zoom range (maximum zoom range is 1 - 20) you will need to execute the "generate-tiles [parameters]" command from the command line.
|
Attention: each zoom level quadruples the number of tiles generated, therefore generating tiles with a wide ranging zoom level may take longer and they may occupy several Gigabytes of space on the disk.
|

Configuring Movicon.NExT to use the generated Tiles
In the "DocumentManagers" folder within the Movicon.NExT installation path you will find the "ScreenManager.dll.config"
file where you will need to modify these items:
3a. "UseOpenStreetMapProvider" setting it to "True" as shown below:

3b. "CustomMapDataProviderUrl" setting it as "file://C:\\Tiles\\{tileLevel}\\{tileX}\\{tileY}.png" as shown below:

The path defined in the "CustomMapDataProviderUrl" indicates Movicon.NExT to search for the map file installed in the "C:\Tiles\" subfolders, where:
{tileLevel} indicates the folder containing the Tiles with a specific zoom level
{tileX} indicates the folder containing the X row of the quadrant.
{tileY} indicates the name of the .png file of the Tile at column Y of the quadrant.